This post may contain affiliate links. As an Amazon Associate, I earn from qualifying purchases. This means that if you click on an affiliate link and make a purchase, I may receive a small commission — at no extra cost to you! For more information, please refer to my Affiliate Disclosure.
Let me guess. You want to create your own skincare routine as a complete beginner, but there’s just so much information to know before starting, and you don’t know where to begin. I get it. Starting a skincare routine can feel overwhelming, but trust me, once you’ve got the basics down, it’s a total game-changer. Whether you’re just starting out or revamping your routine, these steps will leave your skin feeling fresh, glowy, and healthy — no confusing 20-step routine required.
Table of Contents
Guide Overview
In this guide, I’ll walk you through these essential steps:
- Oil Cleanser
- Water-Based Cleanser
- Toner
- Serums
- Moisturizer
- Sunscreen
While it is still important to do your own research and figure out the products that best suit your skin, here are the basic steps to properly layer your skincare products. Please note that I am not a skin professional or a dermatologist, and these are just the products and routine that have worked for me, as someone who suffered with horrible acne. These steps create a powerful routine that hydrates, protects, and keeps your skin looking its best. Let’s dive in!
1. Oil Cleanser

If there’s one oil cleanser that’s never done me dirty, it’s the Skin 1004 Centella Oil Cleanser. This gem melts away sunscreen, makeup, and excess oils like a dream — without leaving your skin feeling tight or dry. Packed with Centella Asiatica, it’s not just a cleanser; it’s your skin’s soothing BFF that calms irritation while giving you that deep-clean feeling.
Now, I know what you’re thinking — Do I really need an oil cleanser? While it’s true that a water-based cleanser is non-negotiable, adding an oil cleanser can make a huge difference. Our pores trap dirt, makeup, and oil throughout the day, and an oil cleanser dives deep into those crevices to lift away the gunk. Trust me, once you try double cleansing, you’ll wonder how you ever skipped this step!
How to Apply:
- Pump 1-2 times into dry hands (I use 5 pumps to remove makeup)
- Massage it into your dry face for 5 minutes(yes, dry face — this helps break down all the grime).
- Add a splash of water to emulsify, then rinse thoroughly.
- Finally, use a water-based cleanser.
Pro Tip:
If you wear waterproof makeup or sunscreen daily, an oil cleanser is non-negotiable. It melts away buildup without harsh scrubbing.
2. Water-Based Cleanser

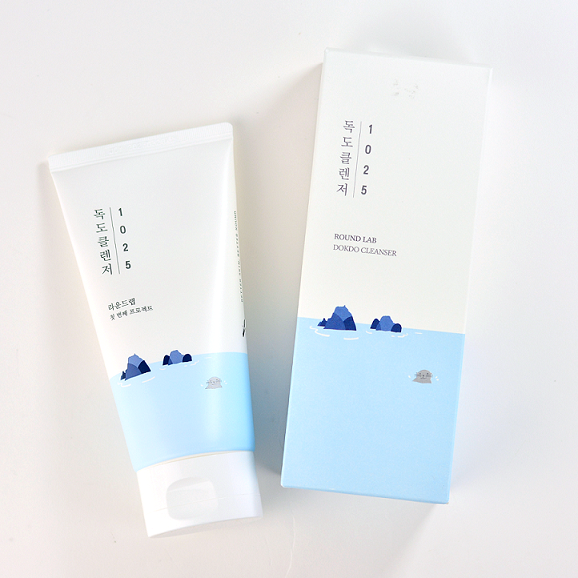
Next up, here is the trusted water-based cleanser that I use — the Round Lab Dokdo Cleanser, which is a total game-changer. This gentle yet effective formula sweeps away leftover oil, sweat, and impurities without leaving your skin feeling stripped. Infused with deep seawater, it’s packed with essential minerals that hydrate and nourish while cleansing. So, while you’re removing the grime, your skin is also getting a boost of moisture — talk about multitasking!
How to Apply:
- Wet your face with lukewarm water.
- Lather a pea-sized amount in your hands.
- Massage it gently in circular motions, then rinse thoroughly.
Pro Tip:
Double cleansing is a game-changer! It helps prevent clogged pores and gives your skin that squeaky-clean feeling — without actually squeaking.
3. Toner

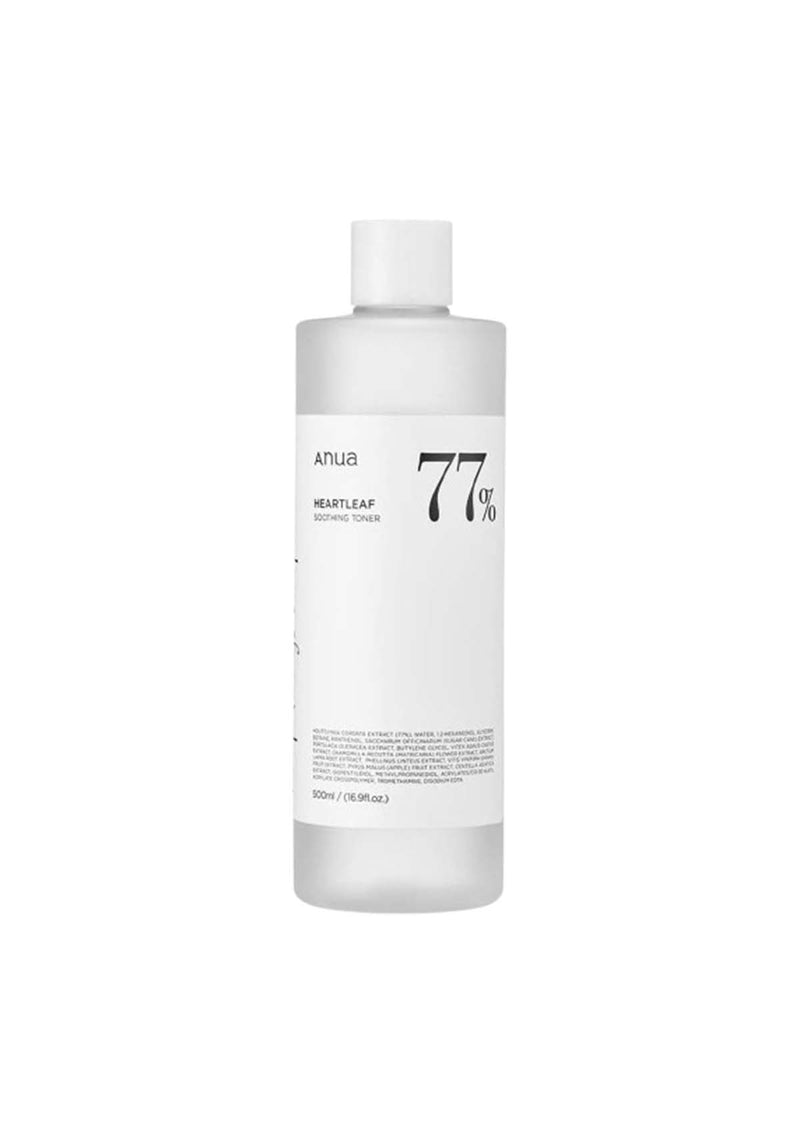
Now let’s talk toner — the underrated hero of your skincare routine. The Anua Heartleaf Toner is your go-to for calming irritation, reducing redness, and giving your skin a surge of hydration. Packed with heartleaf extract, this toner is perfect for sensitive or acne-prone skin, helping to soothe inflammation while prepping your skin to drink up the rest of your products.
How to Apply:
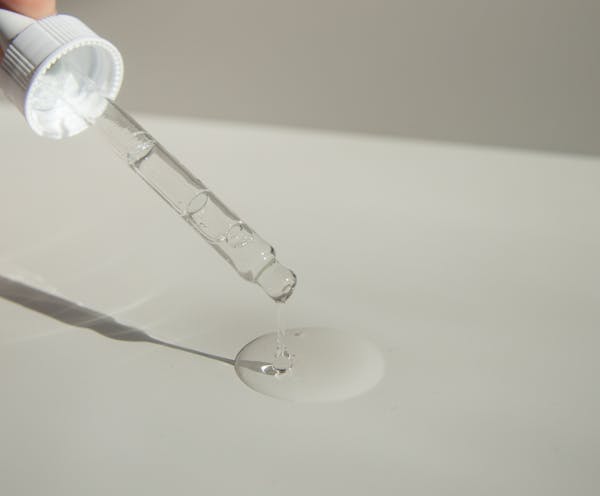
- Pour a few drops onto your hands or a cotton pad.
- Gently press or swipe across your face until it is absorbed.
- Pat your face and wait for a while for your face to dry.
Pro Tip:
Want that ultra-dewy K-beauty glow? Try the “7 Skin Method” — applying toner in multiple thin layers for mega hydration.
4. Serums

Now it’s time to tackle those stubborn skin concerns with some powerful serums! These concentrated formulas deliver targeted results:
- For acne-prone skin: The La Roche Posay Effaclar Ultra-Concentrated Skin Resurfacing Serum works wonders by unclogging pores, reducing inflammation, and minimizing breakouts.
- For brightening: The Dr. Althea Vitamin C Serum is perfect for fading dark spots, evening out your skin tone, and giving you that coveted glow.
- For hydration: The Skin 1004 Centella Serum is a skin-soothing superstar that calms redness, strengthens your barrier, and deeply hydrates your skin.
How I personally layer these products: I go in with the La Roche-Posay serum only at night, then the Dr. Althea Vitamin C Serum, followed by the Skin 1004 Centella Serum.
How to Apply:
- After toning, apply 2-3 drops of your chosen serum(s).
- Gently press the serum into your skin for better absorption.
Pro Tip:
When layering serums, apply the thinnest texture first and work your way up to thicker ones for best results.
5. Moisturizer

Time to lock in all that goodness with a nourishing moisturizer — and the Dr. Althea 345 Relief Cream is a must-try. This rich yet lightweight cream provides deep hydration while calming sensitive or irritated skin. It’s formulated with soothing ingredients that strengthen your skin barrier, making it perfect for those struggling with dryness, redness, or post-acne irritation. I apply an appropriate amount onto my cheeks, forehead, nose, and chin area.
How to Apply:
- Apply a pea-sized amount and gently massage it into your face and neck.
- Use upward motions to promote better absorption (and give yourself a mini face lift — win-win!).
Pro Tip:
Apply your moisturizer while your skin is still slightly damp to seal in extra moisture and keep your skin feeling soft and plump all day.
6. Sunscreen

And finally — the most important step you cannot skip — sunscreen! The Beauty of Joseon Relief Sun SPF 50+ is a lightweight, non-greasy sunscreen that glides on effortlessly without leaving a white cast. Infused with nourishing rice extract, it not only shields your skin from harmful UV rays but also hydrates and brightens for that healthy glow.
When I was younger, I used to think: Why do I need to apply sunscreen even when I’m staying at home? Well, turns out UV rays can still penetrate through windows, meaning your skin is still vulnerable even indoors. Trust me, daily sunscreen is non-negotiable if you want to keep those fine lines, dark spots, and premature aging at bay.
How to Apply:
- Apply a line of product the length of one finger for your face, and again, for your neck. If that’s not enough, applying more! (At least it is better than not putting on sunscreen at all.)
- Reapply every 2-3 hours if you’re outdoors.
Pro Tip:
For the perfect amount of sunscreen, apply a line of product the length of one finger — this ensures you’re getting enough coverage for your face. Don’t forget your neck and ears — these areas are prone to sun damage too! Reapply every 2-3 hours if you’re spending time outdoors. Even on cloudy days, those sneaky UV rays can still cause damage — so stay protected!
FAQ
Q: Can I skip certain steps if I’m short on time?
A: Absolutely! If you’re in a rush, focus on cleansing, moisturizing, and sunscreen as your non-negotiables.
Q: How long should I wait between steps?
A: Give each product 30 seconds to a minute to absorb before moving to the next step for the best results.
Q: Can I mix serums together?
A: Yep! Just avoid layering too many active ingredients at once to prevent irritation. Stick to 2-3 compatible serums max.
What’s Next?
Now that you know the essential skincare steps, figure out the products that suit your skin and build your perfect routine! For more tips, tricks, and product recommendations, check out our articles on glowing skin secrets and acne scar treatments. Like I said, these are just the products that have worked for my acne-prone skin, so feel free to check them out. Here’s to your best skin yet!


Pingback: 10 Best Skincare Tips for Beginners I Wish I Knew Before Starting Out - Auraé | Timeless Beauty
Pingback: How to Romanticize Your Life Through Self-Care in 2025 (Even on a Budget) - Auraé | Timeless Beauty